How to Set Up Contact Form 7 in WordPress to Gain More Customers
A WordPress contact form is a key tool to collect a list of email addresses from potential customers. One popular contact form that many WordPress users utilize is Contact Form 7. It is easy to install and configure and offers functionalities that are beneficial to customer data collection. To know how to use this WordPress contact form, we will show you how to install and configure it to beef up your marketing strategies.
What Are the Best Features of Contact Form 7?
Contact Form 7’s popularity for creating a contact page is due to the following top features:
- Has many third-party extensions for additional functionalities
- Supports CAPTCHA, Ajax-powered submitting, and Akismet spam filtering
- Is easy to set up using a code
- Utilizes simple mark-up to modify mail content
- Has easy custom form fields
- Builds and manages many contact forms
How to Set Up Contact Form 7
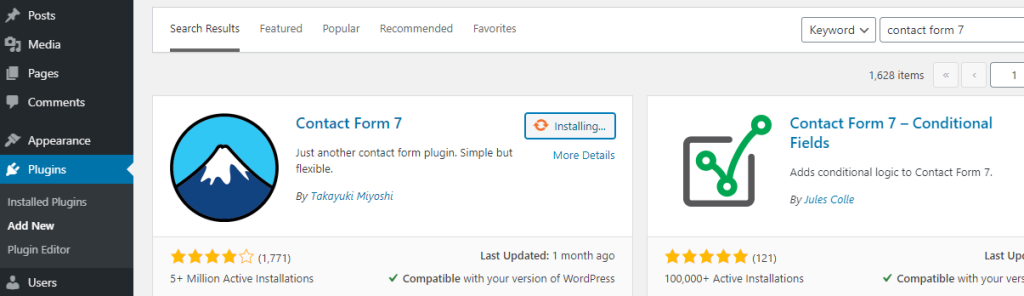
First, you are going to install Contact Form 7. Go to Plugins from your Dashboard menu and select Add New.
Search for the plugin on the search box. Once the plugin appears on the results page, click Install Now and then Activate.
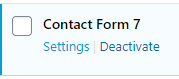
Go to the plugin’s Settings to configure it.
Hover over to the contact form title and select Edit.

On the settings page of the plugin, you will see various tabs. For the Form tab, you can leave everything as is.
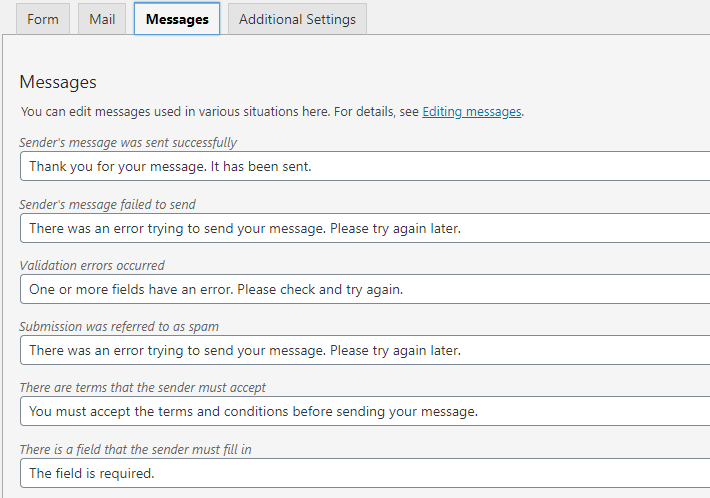
For the Mail tab, you will see that the plugin automatically inputs your WordPress email for the To field. You can change the subject and the body for the email to make it more personalized. For the Messages tab, you can edit or select from the list of messages for various situations. Always click Save at the bottom if you make some changes to each tab.
For the Additional Settings tab, you can click the Additional settings link to know which functionalities you can add to make the contact form more advanced.

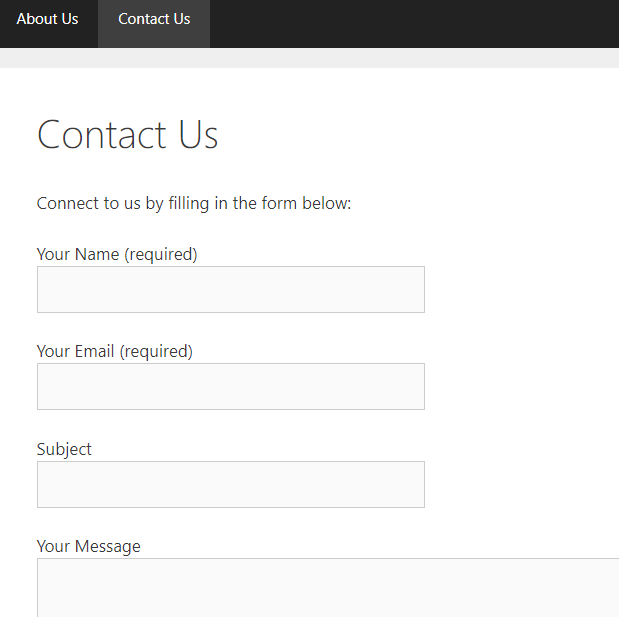
Once everything is set, copy the code you see at the top so you can paste it on the page where you will add the form. We recommend adding the contact form to a page, not to a post, because site visitors typically visit the contact information page for your website when they are interested in your products or services.

Go to Pages and add a new page.

Enter the title for the page and add a brief description about it in the body. Paste the code you copied earlier in the body and click Save Draft.
You can also publish it directly by clicking Publish.
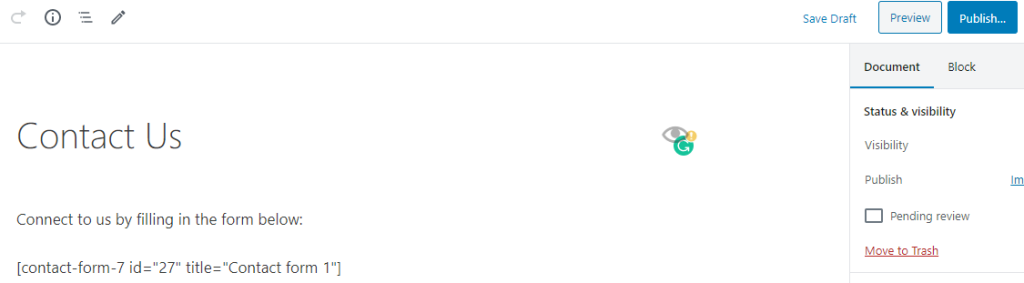
If you go to your website and check the page, you should already see the form in the Contact Us Page.
Conclusion
The steps to add a contact form to WordPress are extremely easy. You just need to install Contact Form 7 and then configure its settings based on how you want it to work.
Install the plugin to your website now and increase your chances of getting more customers!